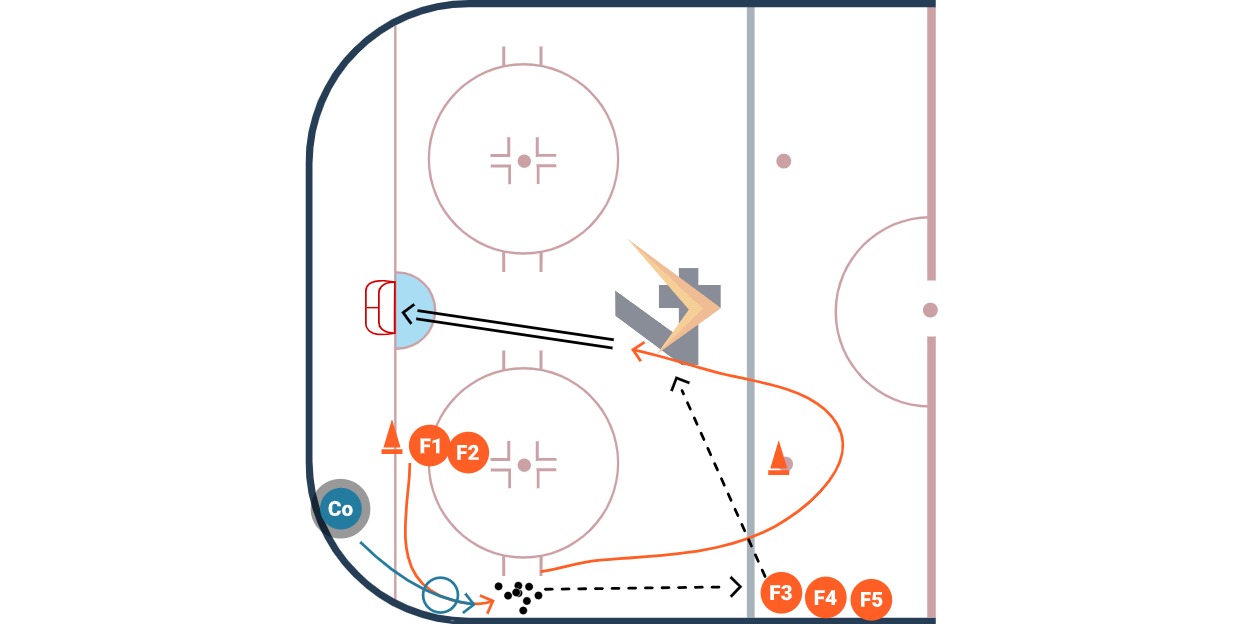
Body Contact Angling #1
Players will start without a puck on the goal line. Take a smart angle and make contact with the dummy being pushed by the coach. Player 1 picks up a loose puck, and passes to their teammate at the blue line. Player 1 will skate around the cone on the faceoff dot, get a pass back from their teammate and go in and shoot.
Watch Video →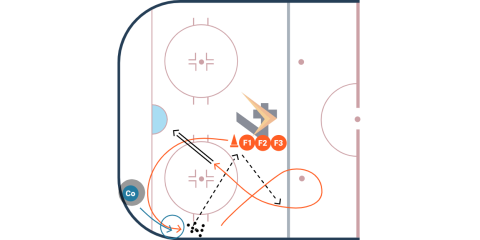
Body Contact Angling #2
Player 1 comes down the center of the ice and forces the coach pushing the dummy up the wall with a good angle. The player will make proper body contact with the dummy and pick up the loose puck and pass it to the front of the line, Player 2. Player 1 will skate around the cone, receive a pass back, and go in and shoot.
Watch Video →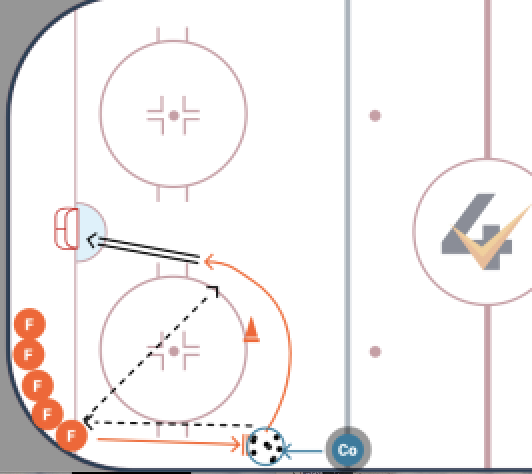
Body Contact Boardside Puck Protection
Player will race towards the loose pucks as the coach approaches the pucks with the dummy. Player will turn towards the puck and make contact with the dummy while protecting the puck. The player will pass to their teammate in line, skate around the cone and get a pass back.
Watch Video →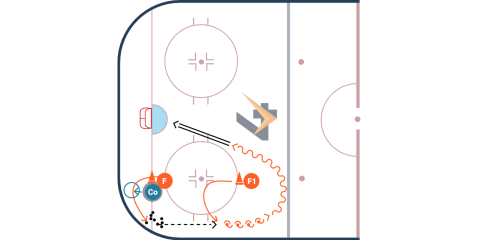
Body Contact Low Corner Drive
Coach begins with the dummy against the player. On the whistle, the player lowers their shoulder and drives through the dummy to the loose pucks. Player makes a pass to the blue line, skates around the cone, gets a pass back and goes in for a shot.
Watch Video →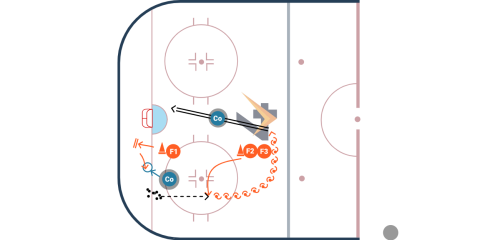
Body Contact Corner Protection Reverse Hit
On the whistle, the player will try to drive low beneath the coach with the dummy. Emphasis being in a strong hockey stance and work to keep yourself off of the wall as the dummy tries to pin you. Gather a puck through the contact and make a quick pass to a teammate before a shot.
Watch Video →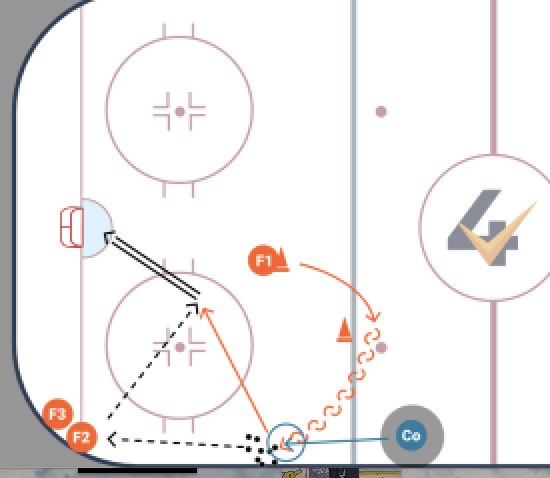
Body Contact Hip Check
Player will hip out around the cone at the top of the zone, and skate lateral before making contact with the dummy along the boards. The player will release off of the hit and pick up a puck and make a pass to the last player in line who shoots.
Watch Video →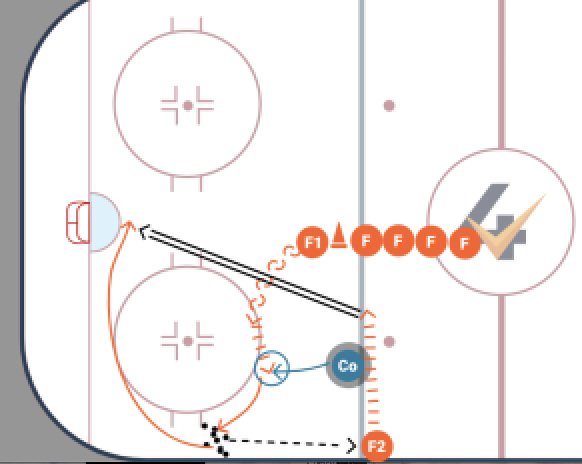
Body Contact Open Ice Hit
Player will start by taking a backwards C-cut and crossover to keep the dummy in front of them. They will step up and make contact with the dummy while putting an emphasis on keeping their hands low. They will then pick up a puck and make a pass to the blue line before going to the net for a tip.
Watch Video →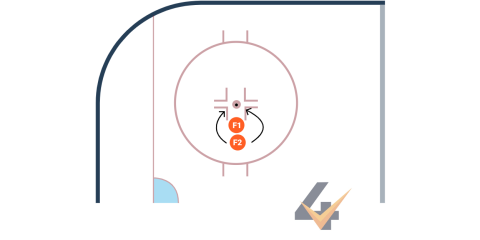
Body Contact Puck Protection Skate Touch
Players start with weight against each other. On the coaches' go, the player on the outside (F2) will use their body to try and drive through the player protecting the puck (F1). F1 may not touch the puck but uses their body to stop F2 from touching the puck. F2 can ONLY touch the puck with their skate. This drill does NOT need to start on a faceoff dot.
Watch Video →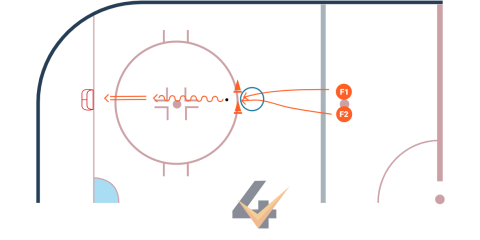
Competitive Contact Cones
Both players will start by having one foot in the faceoff dot, and begin leaning on each other for competitive contact. On the coach's whistle, players will race for the loose puck between the cones and use competitive contact to get their body in front of their opponent.
Watch Video →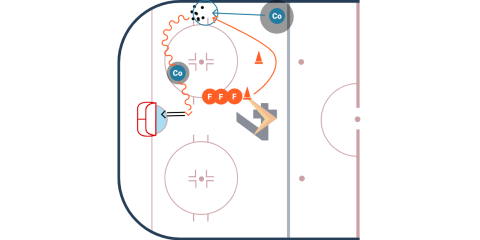
Body Contact Sidewall Corner Attack
Player will race the dummy (Co) to the loose pucks in the corner and initiate contact. Following contact they will pick the puck up and cut to the net for a quick shot attacking from the corner. This drill can be run out of both corners.
Watch Video →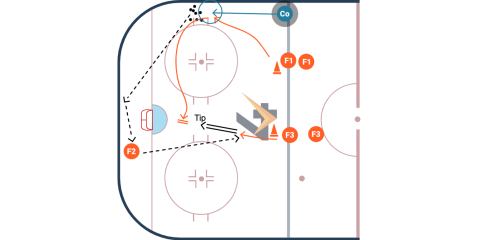
Body Contact Sidewall Angling
F1 will take a good angle and initiate contact with the dummy (CO) along the sidewall. F1 will pick up a puck and make a pass to F2 behind the net before going to the net for a tip. F2 will pass up to F3 for a one-timer or quick shot with a screen in front.
Watch Video →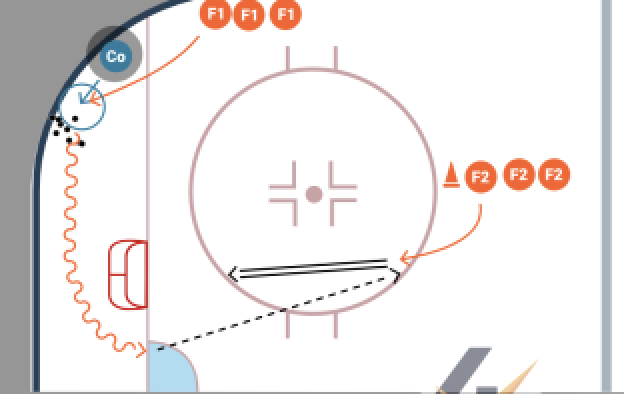
Body Contact Low Angle w/ Shot
F1 will take a good angle and initiate contact with the dummy (Co) prior to picking up a puck. They will then make a pass out to F2 before heading to the front of the net for a tip from the shot of F2. Drill can be run out of both corners.
Watch Video →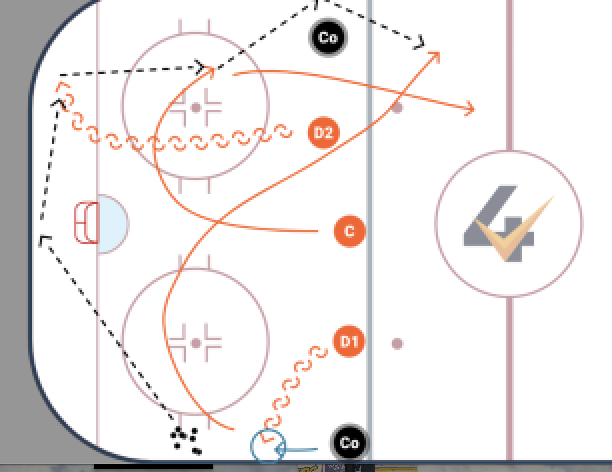
Body Contact Hip Check Breakout
Strong side defenseman will make a hip check or shoulder check on the dummy coming down the wall before picking up a loose puck and making a D-D pass. The center will swing low and receive a pass from the defenseman before chipping the puck around the second dummy for the back side D man to pick up.
Watch Video →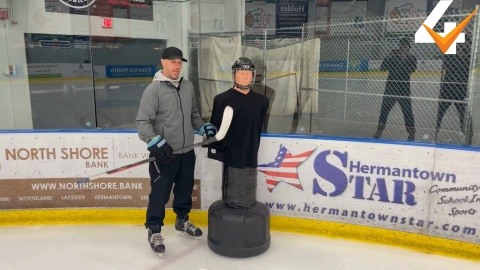
Body Contact Fundamentals
Click on the video link for an explanation of some body contact fundamentals.
Watch Video →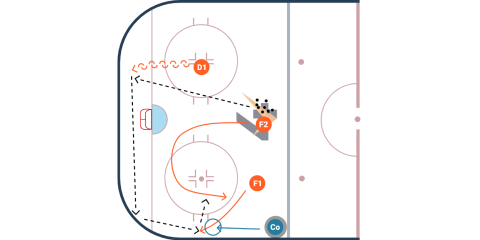
Body Contact D-Zone Wall Work
This drill emphasizes work on breakout pressure. The dummy will pick which side to attack the winger and the winger will need to choose which way to escape the pressure. Ex: Chip high off the glass, corral puck and make a quick inside move to get up the ice.
Watch Video →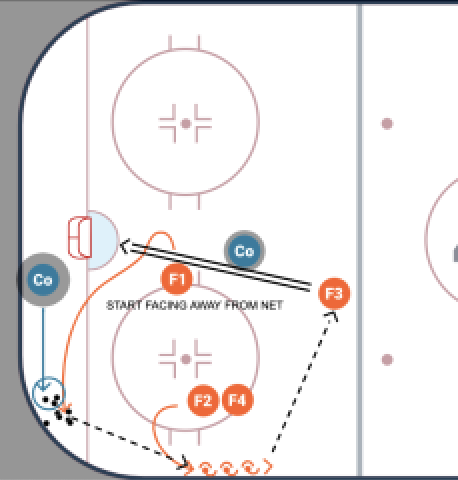
Body Contact Corner Race
F1 starts facing away from the net and then takes a smart angle to wall off the dummy going for the pucks in the corner. F1 will pick up the puck and make a pass to F2 who swings low and hips out. F2 then passes up to F3 for a long shot from the point.
Watch Video →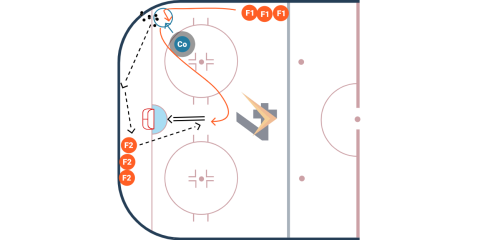
Body Contact Corner Pressure
F1 will skate to corner to pick up puck. Upon pressure from the dummy (Co), player will initiate contact with a reverse hit before picking up a puck and passing to F2. F1 will sprint to the front of the net and receive a pass from F2 from behind the net for a quick shot.
Watch Video →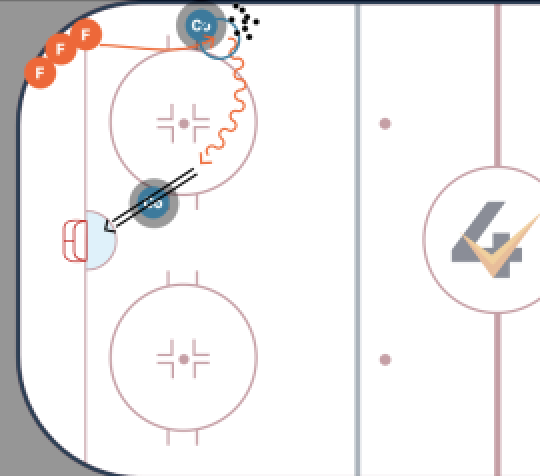
Body Contact Angle w/ Sticklift
Player will skate out from the corner and initiate contact with the dummy along the sidewall. The player will sticklift the dummy and pick up a puck before skating to the net and shooting through the screen. Focus on stick on stick, body on body.